Mr. Johnson


“Where the classroom meets the real world”
WELCOME TO MY CLASS!
Graphic Design & Commercial Art
Commercial Art
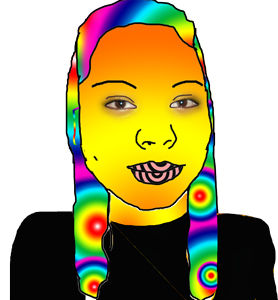
Lesson 3 - Assignment 2 - Draw Your Face with Lines
Draw Your Face with Lines - Assignment 3
Many purists don't consider drawing on the computer as "real" art, but it teaches the basic principle of Line just as well and the end product can be just as amazing!
All video clips and images on this page courtesy of digitalartanddesign.org. 2014.
STEP #1
Take and Open Your Picture in PhotoShop
This is going to be the hardest part!
Decide on if you want to take a picture of yourself (a head and shoulders shot) using Photo Booth, or a higher resolution picture (that we can print out later) with your phone or digital camera (the camera you can borrow from me.)
If you use a phone or camera, transfer your photo to the Desktop. Hit CONTROL + Click on the photo and choose OPEN WITH then Photoshop.
STEP #3
Brush Tool
Select the BRUSH TOOL or click the keyboard shortcut letter "B".
Last Step
Upload to Moodle
Log into Moodle and upload your file from the desktop to Moodle under Lesson 3 Assignment 2 - Draw Your Face With Lines.
Click SHAPE DYNAMICS and then close the Brushes Panel.
STEP #5
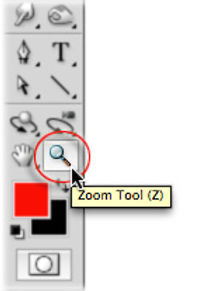
Zoom In
Click the Zoom Tool.
Drag a box around the area you want to ZOOM IN on. This is where you will start drawing.
STEP #6
Begin Tracing Your Image
Use your brush to trace around your face.
Do a good job, but don't make it too complicated!
Check Out Your Work!
STEP #8
Select an Area of Your Face
Choose the Magic Wand Tool.
It might be behind the Quick Selection Tool!
Select a CLOSED part of your shapes with the magic wand (Like inside the hair area).
This means your brush has made a shape that is by itself with a beginning and end and not touching another shape.
STEP #9
Set Up A GRADIENT color
Make a New Layer.
Click the little button next to the Trash at the bottom of the Layer palette, or go to Layer>New>Layer or click SHIFT + COMMAND + N then click OK.
3 different ways to make a New Layer!
… select the Gradient Tool which might be hiding behind the Paint Bucket …
… and click on the Gradient Picker in the menu bar to open the Gradient picker window.
Click on the small arrrow and choose a color gradient.
Color as many places as you can with colors and gradients on as many different layers as you can …
STEP #4
Shape Dynamics
Click the TOGGLE THE BRUSHES Panel Button.
Press COMMAND + J and duplicate the layer with your picture on it.
STEP #13
Save Your File
Go to FILE>SAVE FOR WEB and save as a .jpg
Save it to the DESKTOP as a .jpg approximately 500 pixels wide named: PeriodNumber-LastName-FirstName-Lesson3-Assignment2.jpg
Make sure you have the ".jpg" at the end.


STEP #2
Create a New Layer
Make a New Layer.
Click the little button next to the Trash at the bottom of the Layer palette, or go to Layer>New>Layer or click SHIFT + COMMAND + N then click OK.
3 different ways to make a New Layer!
Double Click on the name of the layer and call it "Contour"

Make sure your original picture layer is locked.
Click the layer with your picture.
Click the LOCK icon at the top of the Layers Palette.


Set your brush to a Hard Edge Small Brush of Size 6.

… and then set your color default Black & White by hitting the letter "D".


STEP #7
Turn The Background Visibility OFF
Click the little eye on the background layer to turn the visibly OFF.


If you can't find a "Closed" area, you may have to use the Polygonal Lasso Tool. Click and drag, click and drag around the area you want to select.


STEP #10
Fill the Selected Area
Click and drag the Gradient Tool across the selected area.
STEP #11
Face Parts
Turn the visibility on again and select the bottom layer …

Turn off the Layer Visibility of the bottom layer …
...and select the new picture layer to work on.


Circle your EYE with one of the LASSO TOOLS.
Hold down the SHIFT key and circle the other eye.
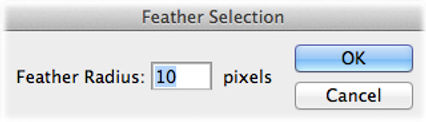
Go to SELECT>MODIFY>FEATHER. Enter 10 pixels.
Click OK.
Go to SELECT>INVERSE or click SHIFT + COMMAND + I.

Click DELETE to erase everything but your eyes.
STEP #12
Trace Contour
Choose the bottom layer with your picture on it.
Click COMMAND + D to deselect everything.
Click COMMAND + J to make a copy of the layer, then click on it.
Go to: Filter > Stylize > Trace Contour. Adjust settings to how you like it.
